|
For this project I would be making a model rocket to launch at Fiesta Island. I wanted to build the rocket because the last time I did anything with rocketry was in first grade when I was a Cub Scout and I basically had an adult do the whole thing. I thought doing it now would be more interesting because I would be old enough to really think about how it works and appreciate the physics that are involved in it. To do the project I had to have a partner. I chose to group up with one of my friend Autrina that I happen to work well with. The first thing we had to do was get the project approved. To do that we had to research all the different components of a model rocket. 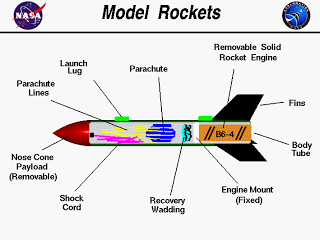 After researching all of the components listed above me and Autrina answers question that our teacher Andrew asked. After we answered the questions we were approved. He gave us a model rocket kit with all the parts and instructions so we could start building our rocket. At the time it seemed like putting the rocket together was really confusing and it was hard to understand the instructions. To put all the pieces together we used super glue. When we were putting the engine holder into place we asked for help from another student and he had us glue it in. Then we realized the engine holder was meant to have the engine placed in it then you can remove it and take the used engine out so you can reuse the rocket. So we wouldn't be able to use that rocket again. I think the engine mount was also too close to the bottom of the rocket because the engine stuck out of the bottom end. 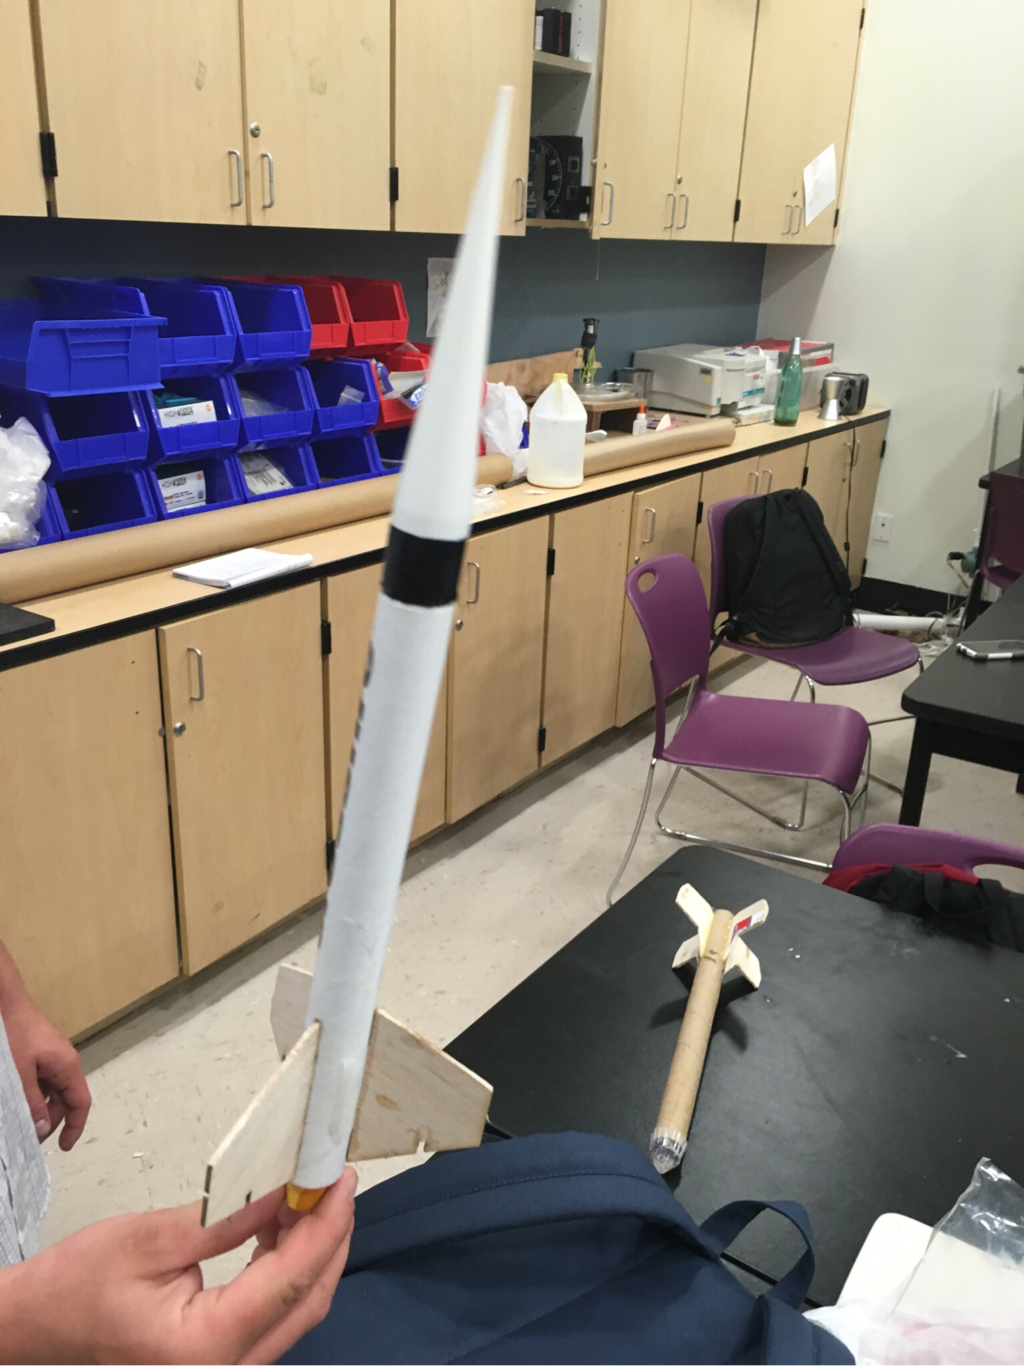 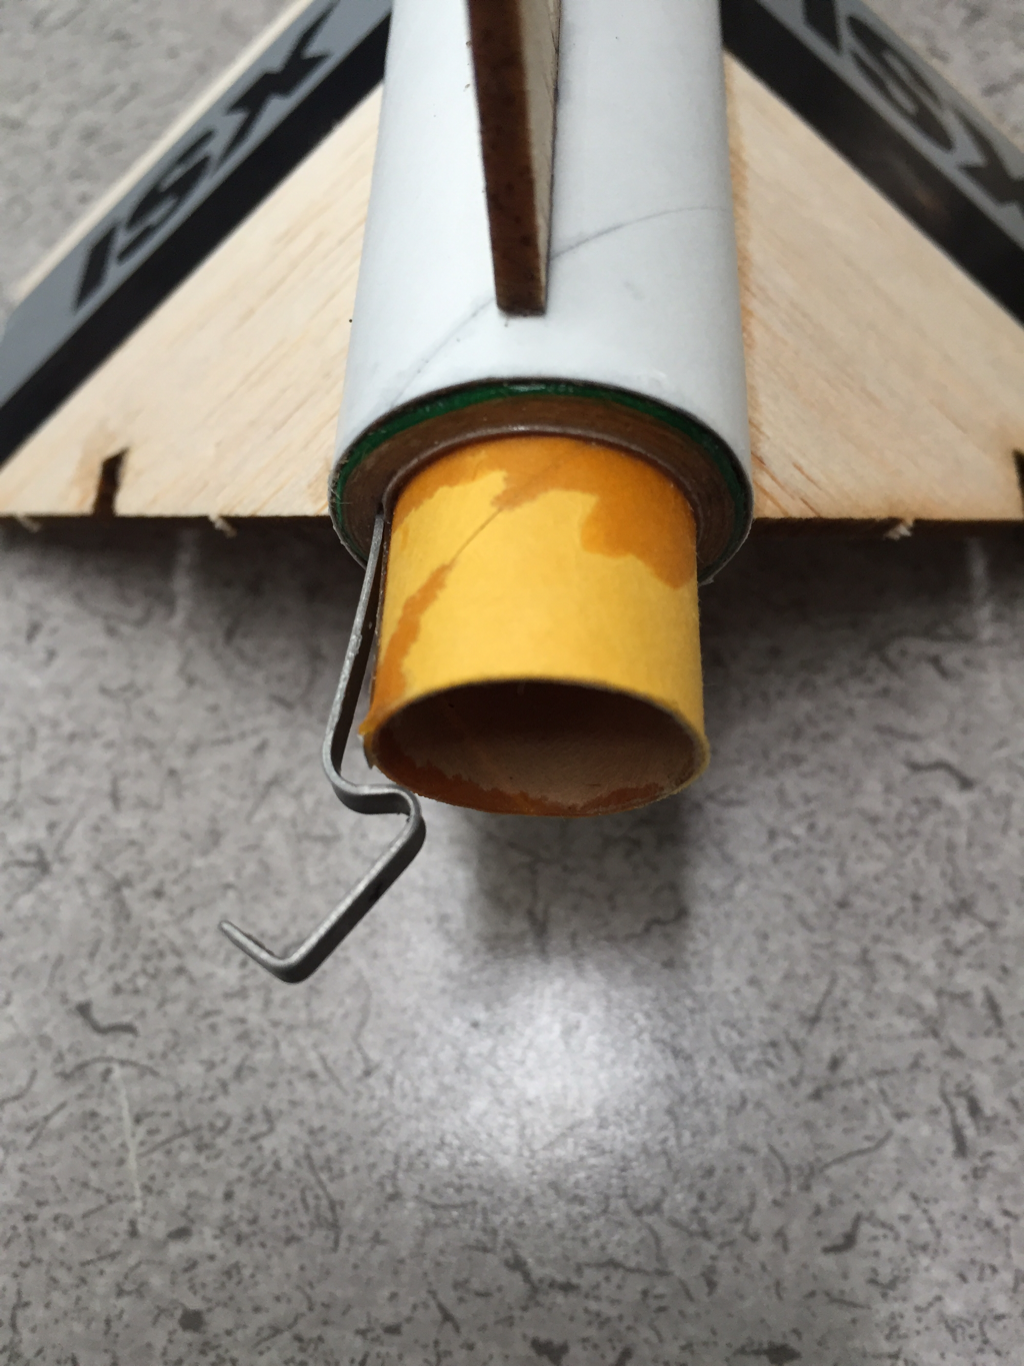 Luckily we were still able to launch the rocket. So we stuck the engine into the engine holder, the recovery wadding into the body tub and headed to Fiesta Island. Once we got there we set up the launch pad. Before we could launch we had to stick these two little metal wires in the engine then bend the part that stuck out of the engine at a 90 degree angle. Then we put this little pink plug in to keep the wire in place. We connected the wires to the devise that sparks the engine. We counted down and our rocket launched. Our rocket flew really well and went straight up into the air about 200 feet. Then when it started falling we noticed the nose cone and the parachute disconnected from the rest of the rocket. We saw the rocket hit the ground kind of far away but the parachute and nose kept gliding further. We were able to find the rest of the rocket but when we went looking for the nose we couldn't find it, we assumed it just fell in the bay water that was past this hill at the launching ground.  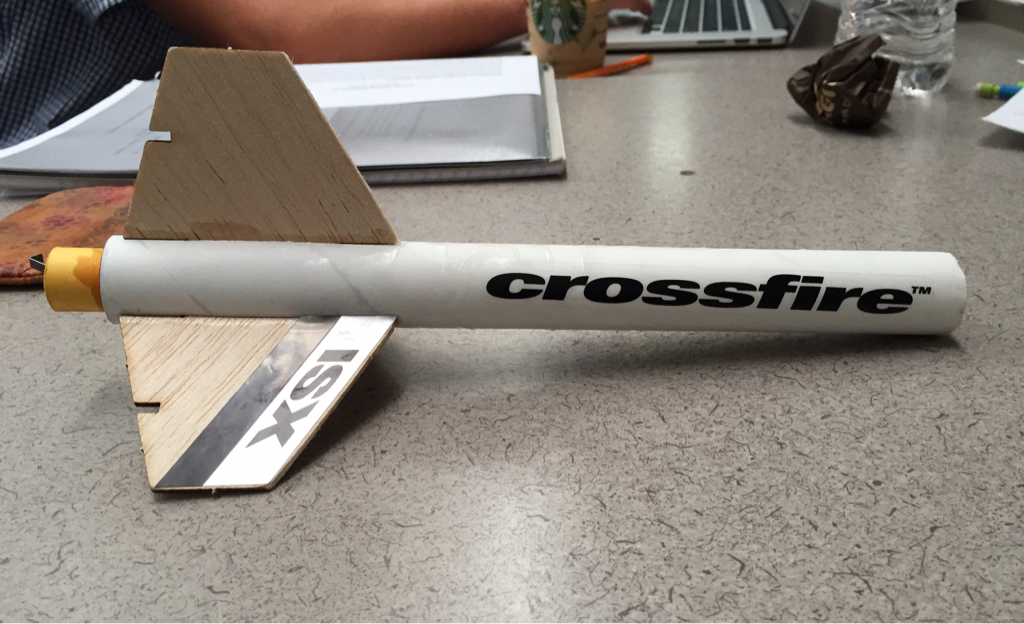 I'm really happy that I got to make the rocket. I took away a lot more than I did when I was little. It was really fun to do and I think next I'd want to make my own rocket from scratch now that I know all the parts to it and how to put them together properly.
For this experiment me and my partner Autrina used cooking oil, water, and food coloring to show an example of density. We started by putting water in a glass jar. Then we mixed together a small amount of the oil and about five drops of food coloring, just enough so that the food coloring separated and spread out in small dots throughout the oil. We poured the mix on top of the water. The food coloring is meant to slowly start to separate from the oil and rain small drops of the dye then hit the bottom of the glass and look sort of like a fire work. A dilemma we had was that the dye was yellow so you couldn't really tell it apart from the oil. I think we also mixed the oil and food coloring a bit too much and so the drops of food coloring ended up bein too small. In the end the one good picture we got of the experiment ended up looking cool. 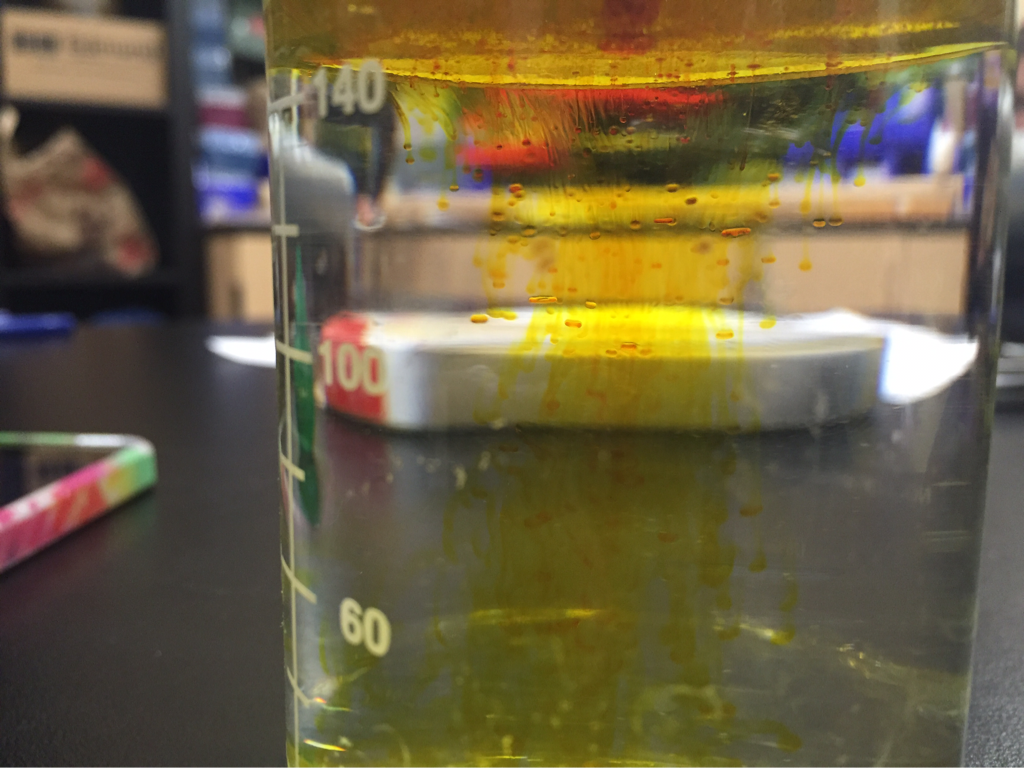 For this experiment me and my two othe group members made a necklace with a bismuth crystal. Bismuth is a type of metal with a melting point of 520 degrees Fahrenheit so we were able to melt it down using a hot plate. While the mismatch melts a layer of powder grey slag forms on top. Slag forms on smelting metal. It's a layer of metal oxides and silicone dioxide so it's important that you scrap it off. Once the metal was 100% liquid we turned off the hot plate to let it cool. When the sides started to solidify we had to pour the remaining liquid into a separate metal container and the crystals were supposed to be in the original metal container, but we emptied the liquid out two soon the first two times we tried. The third time we tried our teacher Andrew used a blowtorch to speed up the melting process. This time, once it was fully melted we dropped a seed crystal in to help raise our successfully getting the crystals to form. A seed crystal is a tiny single crystal dropped in the melted bismuth. The seed melts and larger crystals are drawn up by either precipitation, centrifuging, or drawing up from a melt. Once the liquid that the seed was dropped into solidified enough we poured the remaining liquid in the container. This time the crystals turned out really good and had a blue and purple color. we then picked out the piece we wanted to use on the necklace. We connected it to a silver chain by gluing clear fishing wire that's had been wrapped around the crystal. With the extra slack I tied it in a knot around the chain. Because the wire was clear you can't really see it and so it sort of looks like the crystal is floating on your neck. So in the end we were able to make really pretty crystals and a cool necklace. we also had to find why bismuth crystals form in the shapes they do. They form in a rhombohedral crystal structure. This makes them form in angular hopper shaped crystals. It forms this way because the molecules are more energetically favorable positions than the interior and faces of the crystals. So when the bismuth is cooling and the crystals start to form, the molecules continue forming crystal edges but never fill in the centers when crystallizing.
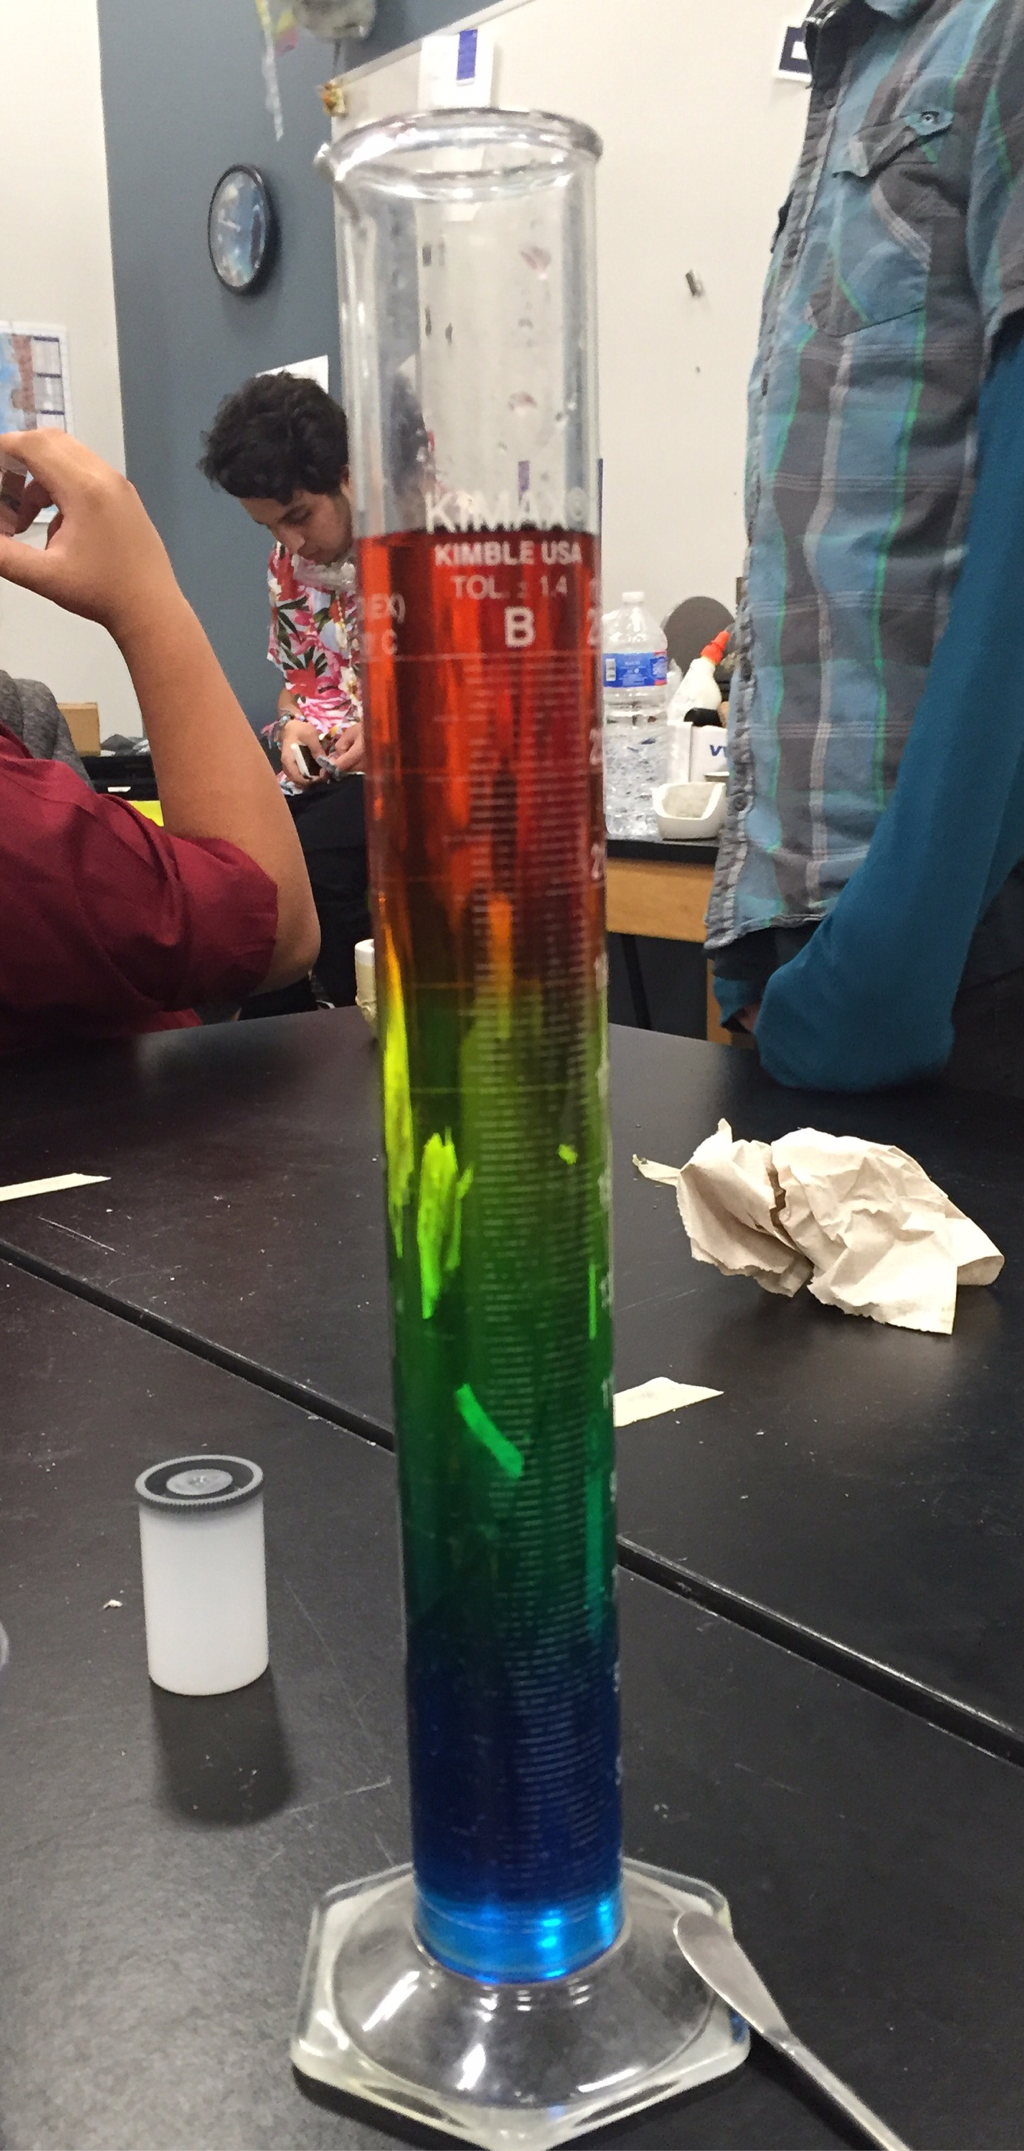 A rainbow density column is a glass cylinder with a rainbow of water in it. We made this by mixing water and food coloring in four cups. The colors we used were red, yellow, green, and blue. We then mixed different amounts of sugar in each glass. This caused the colors to have different amounts of density. It took about ten minutes to fully dissolve the sugar in the blue and green water because those were the two with the most amounts of sugar. Once they were all mixed together we slowly poured them all into the cylinder. We poured in order of most to least dense. We had to pour the water over the back side of a spoon so that it poured slowly, other wise they could have mixed together. The final product turned out really good and you could clearly see the changes in color/density. I didn't think that the colors would stay separated before I did this experiment, because each color was just water and sugar. This lab helped me understand density much more than I did before.
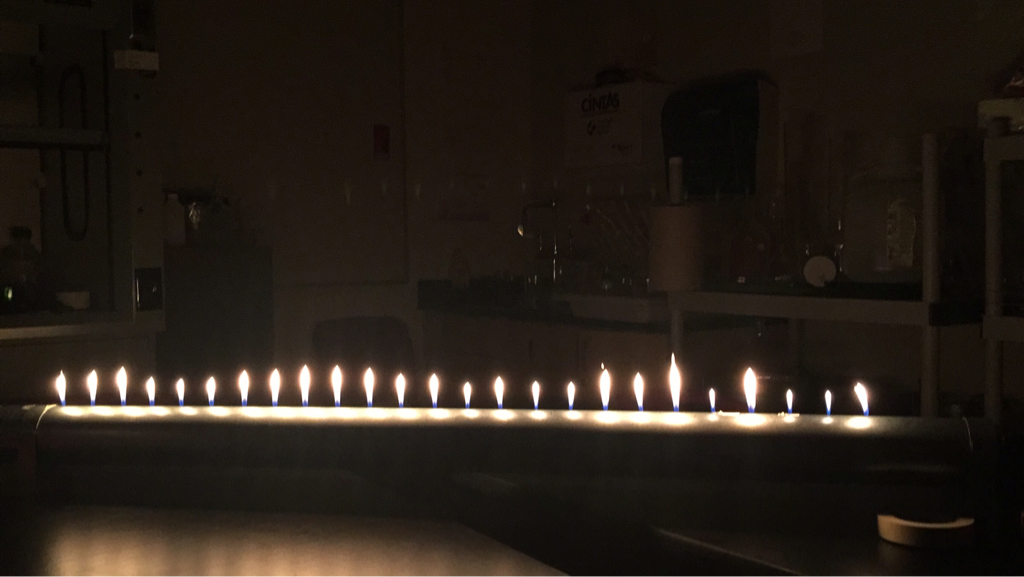 Making the tubeThe tube we used was a 3 1/2 inch in diamater metal airduct. To close the tube off we used brackets on one side to close of a balloon as the diaphragm. The other side we closed off with a water bottle fastened inside with silicone sealant. We then realized that in order for the sound waves to properly bounce off that end of the tube the surface needed to be flat, so we went out an bought an air tight cap to close the tube off. Next we had to drill the holes on top. We messured the holes to have 25 hole all 2 inches apart. To make the hole that the propane would be pumped in from we had to make sure that the total area of that hole was less than the area of all the holes on top. We used the equation (3.14)r^2 for 1/16 the top holes and 3/4 the bottom hole. The total amount of top holes we could fit on was 36 holes. So we knew that the 25 holes would work. Setting up to light the tubeWe set the tube in between 2 tables so the pipe connected to the gas tank could fill it from underneath. We used a small speaker connected to the stereo system in the classroom. The music was played off of an auxiliary cord so we could just play music from our phones. To actually light the tube we had to have the room empty in case the tube happened to blow up. We waited until the room was empty during 3rd period. Me and my 2 other group members, Nicholas, and Autrina had to sit behind a blast shield while the tube filled with gas so our teacher could light it. After about 5 minutes we were able to get one tiny blue flame. We lit the rest and waited about another 5 minutes for the flames to grow to their full height witch was about 4 1/2 inches tall. When we first plugged in nicks phone to play music the static from the speaker was so loud the fire went out and we had to quickly relight the flames. End productWe played a G note into the tube from a guitar tuning site on a phone. That made a clean wave going back and forth in the tube. This happens because when you create sound waves in the tube whether or not the gas is lit its creating pockets of high and low pressure. This pressure is created because the sound waves are constant and when the new sound waves are hitting the sound waves that bounce off of the other side of the tube creating pockets of high and low pressure. Then drilling the holes lets the high pressure in some spots escape. Now when you light it the pressure is causing higher amounts of propane to escape though the holes making the flames grow. Another thing we played into the tube was Dazed and Confused by Led Zeppelin. This isn't as smooth of waves because there are more sound waves being created so the pressure is more sporadic, causing the flames to only really match up when the bass of the song is stronger. Side note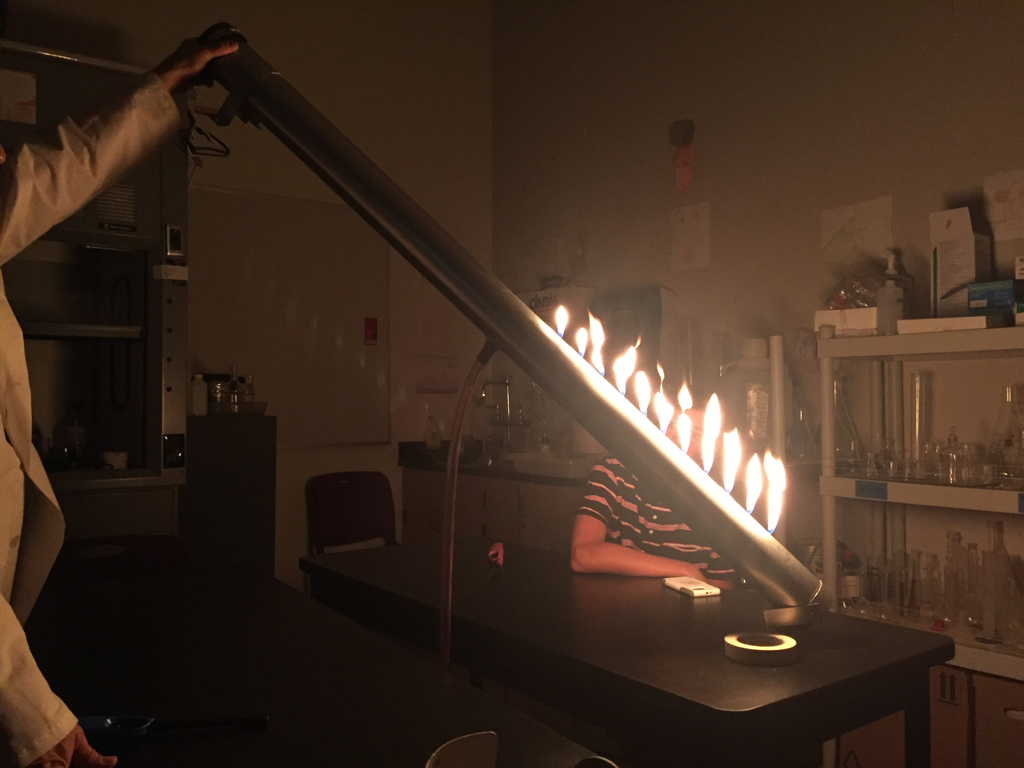 while cleaning up and letting the propane fully burn out, we found out that propane is heavier than air by tipping the tube all the propane went to one side the flames on the lower side grew a lot.
For this exparament me and 4 other students mixed together baking soda and vinegar in a flask to create carbon dioxide. 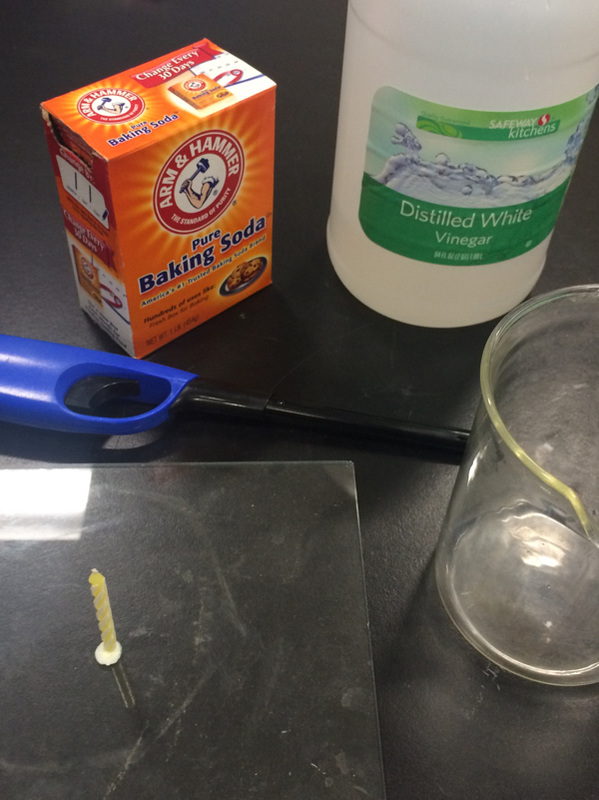 After mixing them together we tilted the glass over a lit candle. Tilting it caused the fire to go out. This happens because carbon dioxide is heavier then the air outside of the glass. So the gas stayed in the container and when we tilted the glass it poured the gas onto the fire. Since fire is fuled by the oxygen around it the CO2 suffocated the fire putting it out. I think this exparament went well but we failed a few times and the fire didn't go out. We had to try it about 3 times before it worked right. |
AuthorI'm a 10th grader at HTH. This is my blog for chemistery class. I'll have this class forthe first semester until it is replaced by spanish. |
 RSS Feed
